|
|
Post by Admin on Sept 8, 2009 16:18:02 GMT -5
Hi, my name is Tammy and I will be your mod for the Digital Scrapbooking section. I don't know much about paper scrapping as I have never done it, but I can try to help as best as I can..  I have been friends with Jules for a few years now, we meet on Myspace, and when she asked me to help her mod one of the sections, I just couldn't say no.. As many of you know she is a total doll! I have been digiscrapping for just over a year now, and I am totally addicted, you can visit my link below to see some of my work.. I am a Stay at Home Mom of three beautiful but rambunctious boys. I am also totally addicted to reading and True Blood. We currently reside in West Tennessee, but I am originally from Albany NY and boy do I sometimes miss home.. I am also taking digital scrapbooking lessons for PhotoShop, as I normally don't scrap in that program. Once I have completed these lessons I will be offering classes on the forums for those of you who would like to learn how to scrap digitally. Can't wait to scrap with everyone! Tammy's Blog My Digital Layouts jujubeesscrapbookcorner.com/gallery2/categories.php?cat_id=16 |
|
|
|
Post by Admin on Sept 8, 2009 14:31:45 GMT -5
Today I have a really quick and easy ribbon flower tutorial to share with you fabulous ladies! These flowers are a wonderful way to add a custom personal touch to your pages especially if you can't find that right embellie! And hey - you can use up your scrap ribbon too!! First what we need:* Scrap Ribbons - on average my lengths were about 10-12 inches * Scissors * Thread * Needle 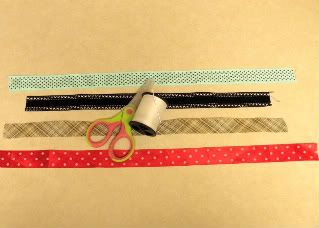 Then we simply thread our needle, knotting the end of the thread, and start running a quick basting stitch close the edge of one side of the ribbon!  Once you get the entire length of the ribbon stitched up gently pull the thread until you get a slight gather in the ribbon. 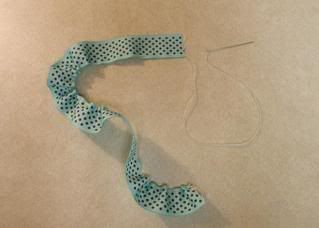 Then begin to wrap your ribbon until you get something that YOU think looks good. This may require you to pull on the thread some more to gather it more or to let out what you have already gathered a bit, it's all about making it look like what you want! 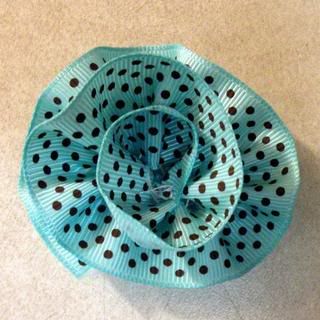 When you get your ribbon flower to look how you want then take your needle and thread and seal the deal :-) I like to just make a few stitches through the middle of the flower to tack it all together just to make sure that it will remain solid! 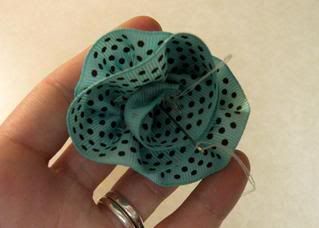 And now you have the basic of your ribbon flower! All you have left to do is embellish the center and you are good to go! You can embellish it with whatever your heart desires, which is the fun part!! 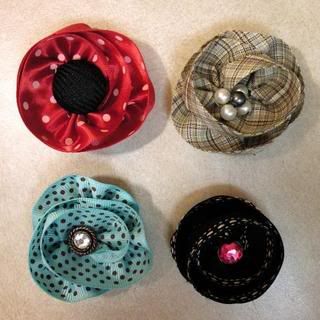 I absolutely can not wait to see your Ribbon Flowers :-) |
|
|
|
Post by Admin on Sept 8, 2009 14:30:18 GMT -5
Okay now for those uber cool and super easy lolli pop flowers . You Can Click the pictures to make larger. Tools need to make paper Flowers:• Scissors or Cricut (I used the Plantin School Book Cartridge) • White Paint • Paint Brush • Brads • Spray Bottle or Glitter Water Spray • Hole Punch (I used my Big Bite Crop-a-dile, the smaller hole) • Your choice of Card Stock or heavy weight pattern paper • Distresser is Optional (I don’t use it) Lollipop Flowers (Much like the new Primas!) Step One:Pick your card stock. You can pick 1 paper or a few.  Step Two: Step Two:Cut out your circles If you hand cut them you don’t have to follow sizes just make them one bigger than the last. 1st Layer – 1/2 inch Circle 2nd Layer – 1 inch circle 3rd Layer – 1 ½ inch circle 4th Layer – 2 inch circle 5th Layer – 2 ½ inch circle 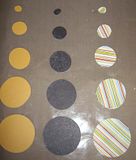 *You only need one of each size to make a flower but I did 2 of each size to make a second flower.Step Three: *You only need one of each size to make a flower but I did 2 of each size to make a second flower.Step Three:Paint the edges of the Circles (You can distress the edges first if you’d like.) You can either let them dry or get a little messy! 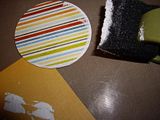 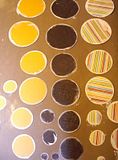 Step Four: Step Four:Punch a hole in the center of the circles.  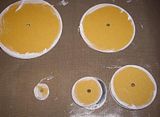 Step Five: Step Five:Pick your brad, I chose silver just because. 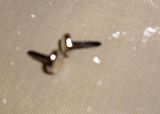 Step Six: Step Six:Stack the flowers from smallest on top to largest on bottom. Put Brad through holes and secure. Because I choose to do three sheets of circles I was able to do 1 of each color in a solid flower and 3 that were all mixed up. 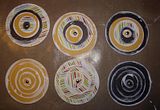 Step Seven: Step Seven:Lay out your flowers over paper towels and pray with water to moisten.  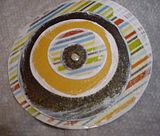 Step Eight: Step Eight:Start to mold your flowers with lefts and cripples to add texture. You might have to moisten them more to mold on the lower layers. Flatten out for better use on Layouts and card or leave as a Bulb. 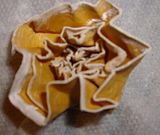 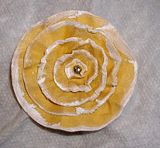 Step Nine: Step Nine:Let dry overnight before using is best. Or use a Heat gun. 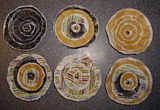 ~Painting the edges & the molding process are optional. |
|
|
|
Post by Admin on Sept 8, 2009 14:29:04 GMT -5
You know those cute little lolli pop flowers? Well we're going to take it a little further with hearts. *If you haven't seen how to do the lolli pop flowers, let me know I have the tutorial for that ready too.  Tools need to make paper Flowers: • Scissors or Cricut (I used the Plantin School Book Cartridge) • White Paint • Paint Brush • Brads • Spray Bottle or Glitter Water Spray (Optional) • Hole Punch (I used my Big Bite Crop-a-dile, the smaller hole) • Your choice of Card Stock or heavy weight pattern paper • Distresser (Optional) (I don’t use it) Step One - Pick your card stock. You can pick 1 paper or a few. 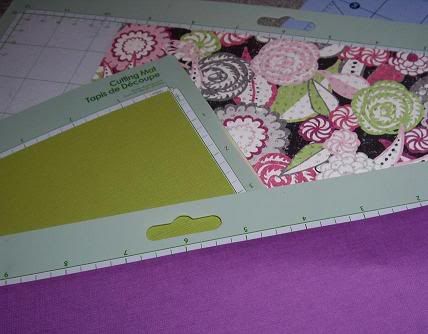 Step Two – Cut out your hearts Step Two – Cut out your heartsIf you hand cut them you don’t have to follow sizes just make them one bigger than the last. Made with hearts. 1st layer 3 small hearts 2nd layer 4 bigger hearts 3rd layer 5 bigger hearts 4th layer 6 bigger hearts 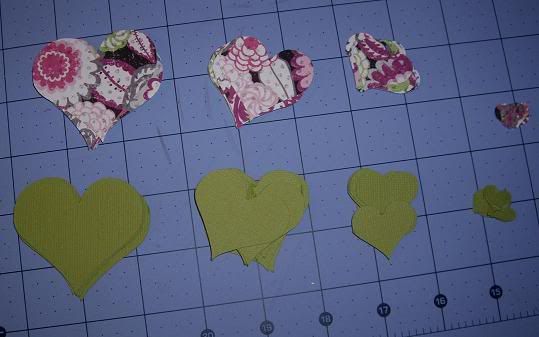 *You only need one set of each size to make a flower but I did 2 sets of each size to make a second flower. Step Three – Paint the edges of the hearts (You can distress the edges first if you’d like.)You can either let them dry or get a little messy! 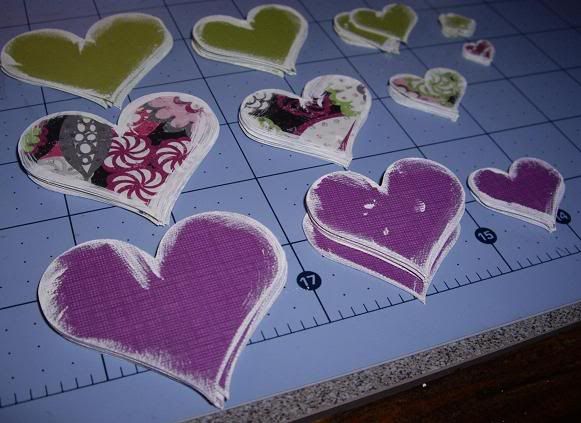 Step Four - Punch a hole in the pointed end of the hearts. Step Four - Punch a hole in the pointed end of the hearts.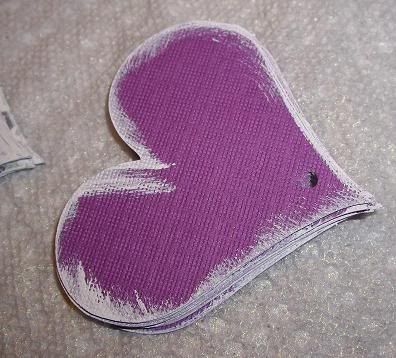 Step Five – Pick your brad, I chose silver just because. Step Five – Pick your brad, I chose silver just because.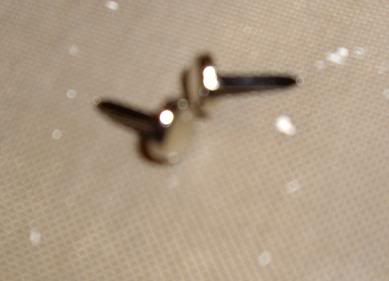 Step Six – Stack the hearts from smallest on top to largest on bottom. Put Brad through holes and secure. Step Six – Stack the hearts from smallest on top to largest on bottom. Put Brad through holes and secure. Because I choose to do three sheets of hearts I was able to do 1 of each color in a solid flower and 3 that were all mixed up. 1st layer 3 small hearts 2nd layer 4 bigger hearts 3rd layer 5 bigger hearts 4th layer 6 bigger hearts 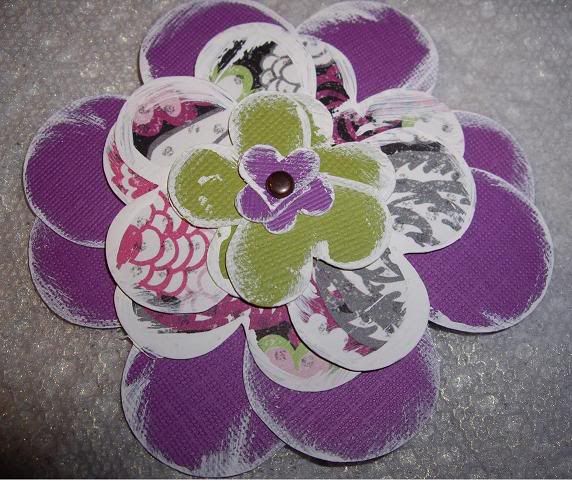 Step Seven – Lay out your flowers over paper towels and pray with water to moisten. Step Seven – Lay out your flowers over paper towels and pray with water to moisten.  Step Eight – Start to mold your flowers with lefts and cripples to add texture. Step Eight – Start to mold your flowers with lefts and cripples to add texture. You might have to moisten them more to mold the lower layers. Flatten out for better use on Layouts and card or leave as a Bulb. 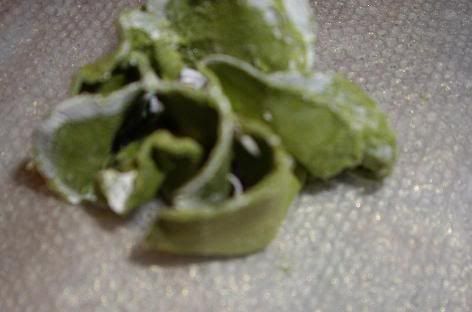 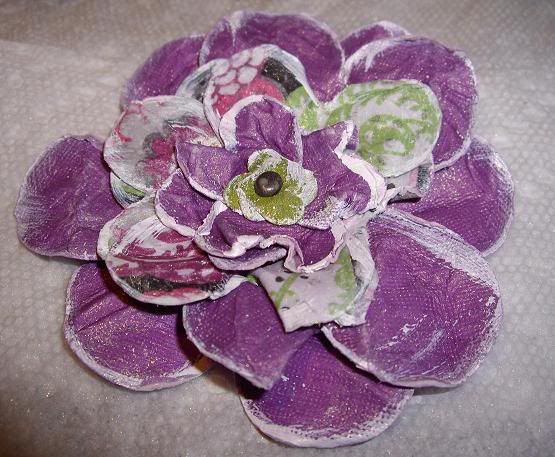 Step Nine – Let dry overnight before using is best. Step Nine – Let dry overnight before using is best.*Sorry about the blurry pictures. |
|
|
|
Post by Admin on Sept 8, 2009 14:12:26 GMT -5
Hello Ladies,
We are proud to introduce Trisha as our Design Team Coordinator. Trisha will be designing for us, along with being our sketch artist and helping out with the Design Team. Here is a little more info on her:Hello! My name is Trisha. I've been scrapbooking for about 8 years. My sister introduced me to patterned paper and I've been addicted ever since. I've lived in this small Texas town all of my life and have no plans of leaving:) I am married and have two beautiful children; a daughter and a son. They are the center of my world and my motivation to scrap. I am passionate about leaving behind a legacy for them...there are no "little" moments. Every moment matters:) Trisha's Blog |
|
|
|
FAQ's
Sept 7, 2009 4:15:59 GMT -5
Post by Admin on Sept 7, 2009 4:15:59 GMT -5
Terms and Conditions:All memberships are billed on the 10th of each month and must be paid for by the 15th.
Kits are sent for shipment once we receive and process your payment on the 15th of each month. Payments that are received after the 15th of each month are shipped 1-3 days after our main shipment has been mailed. Once a credit card/paypal has been billed and your kit has shipped, we do not accept returned kits, unless the kit has been damaged during shipment, or due to an error on our part. Please contact us immediatley at customerservice@jujubeesscrapbookcorner.com if this should happen.How do I become a member and what does that mean?To become a member you can purchase your 6 month membership in our STORE, once you sign up for the 6 month subscription we will contact you for recurring billing. Each month we will debut a brand new kit (add-ons and project kits coming soon). Our kits debut on the 15th of each month here on our forum for the time being. We also offer one time purchases of our kits, when available, which only come available on the 1st of each month. As a subscriber however, you are automatically billed and sent our main kit for each month, which means you are guaranteed our main kit each month.How long is a sub for?:JuJu Bee's kit club is re-occurring, which means you receive the kit each month until you wish to cancel your subscription, however there is an initial 6 month commitment to your subscription. After 6 months you may cancel at anytime without penalty, as long as it follows the guidelines listed below for cancellation notice. (please scroll down to see our cancellation policy). If you cancel before the 6 months has been filled there is a $15.00 penalty fee for canceling early. One incentive of being a subscriber is that you automatically get the kit each month, (which may be sold out), and you receive it at a discounted price of $32.95 for U.S & Canada members and $39.25 for all other international members which INCLUDES shipping. Our normal price if you were to purchase it individually each month is $35.95 (U.S. & Canada) and $42.25 for all other International. Unfortunately, kits on a subscription plan may not be skipped. If there are extenuating circumstances email us at customerservice@jujubeesscrapbookcorner.com and we will discuss the matter with you. When will my subscription begin? [/u] If the current month's kit is still available, your subscription will begin that month. If the kit for that month is sold out then your subscription will begin the following month or the month indicated in our store/forum. What types of payment does JuJu Bee's accept?We use Paypal to accept payments. With PayPal you can use any major credit card, or use your current PayPal account. We also accept check's and money orders, but it must clear our bank before your kit can be shipped. Cancellation Policy:[/u] Cancellation policy on all new subscriptions is as follows: since this is a reoccurring sub,( which means it does not end until you notify us). If at any time you wish to STOP your subscription , simply send us an e-mail by the 1st of the month previous that you wish to cancel. For example, if you wish to cancel your sub in July, you would need to notify us on or before the 1st of June of your cancellation. If it's past the 1st, you will need to take the next months' kit as it has already been ordered for you. There is also a cancellation fee of $15.00, only if you do not cancel before the 1st of the month previous and/OR ,before you have full-filled 6 months of a subscription to JuJu Bee's. Any other questions? [/u] Please contact us at customerservice@jujubeesscrapbookcorner.com and we will be more than happy to answer them for you.
|
|
|
|
Post by Admin on Sept 7, 2009 4:14:26 GMT -5
We invite you to join our monthly scrapbook kit club and experience the possibilities our coordinated kits offer. With plenty of materials and ideas to jump start your imagination, preserving your memories will be effortless and enjoyable.
You'll find kits filled with products from a variety of manufacturers, coordinated for ease-of-use by both the advanced and novice scrapbooker.
JuJu Bee's kit club is all about you and helping you preserve your memories.
As a member you are guaranteed a fantabulous kit full of scrapalicious products, an exclusive sketch design and plenty of ideas from our talented and creative design team and first dibs on any add-on kits. You will be able to preview each month's kit on the 10th of each month and your kit will begin shipping on the 15th of each month.
Monthly Kits will include:
*6-10 sheets of patterned paper
*2-4 sheets of cardstock
*At least one alpha
*Journaling spots
*A variety of embellishments, which may include: flowers, buttons, rub-ons, chipboard, ribbon and more! |
|


