
Post by amy on Oct 31, 2009 5:02:44 GMT -5
With being sick I missed my tutorial and I am SO sorry I did. But thank you Kristin for coming in and posting your fabulous Butterfly one!!! I am here now doing a make-up tutorial, per say! I was busy creating tonight and I was messing around with flowers....yes I know...more flowers! I promise this is the last one for while, but I just had to share this one with you. It is so easy and fast and I just love it! The pictures are a little dark (it's almost 3am) so sorry about that part!
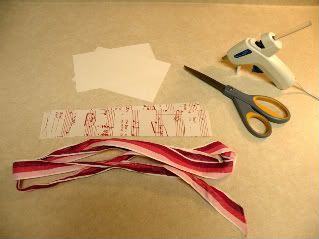
Supplies Needed:
*Glue Gun
*Scrap cardstock
*Scissors
*Ribbon/Paper
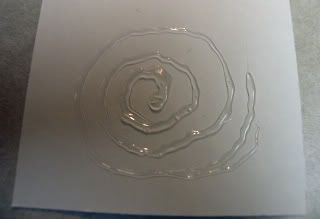
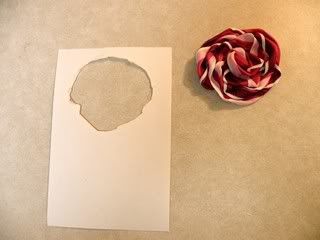
First what we need to do is using our glue gun make a swirl of glue on our cardstock. Whatever size you want your flower to be.
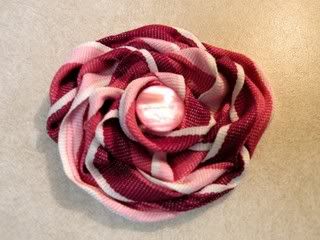
Then we start adding our ribbon. Starting on the outside working in. As you adhear your ribbon to the glue you need to keep twisting and scrunching it loosly.
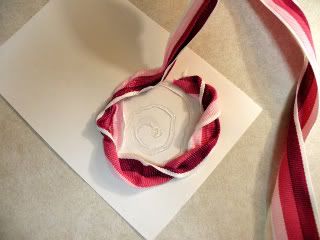
Keep twisting/scrunching your ribbon until you get to the middle. When you get to the very middle cut the ribbon about 1/2 inch and tuck that into the center making it look pretty!
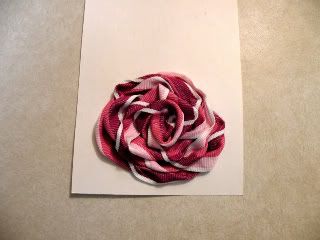
Then simply cut the cardstock around the flower as close to the ribbon as you can. This ensures that your flower has a sturdy back!
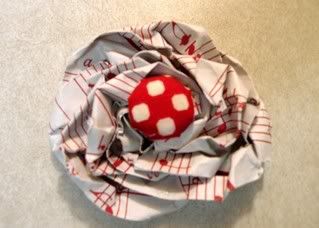
Add a center if you wish. I think they look pretty without centers too!!
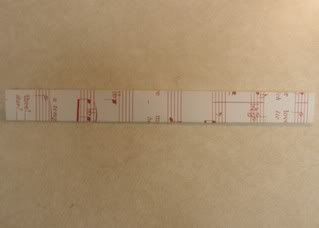
Next I am going to show you how to do this with paper. You will need to cut your paper into 2 inch strips. So they will be 2in x 12in. You will need 2 of these. Fold them in half .
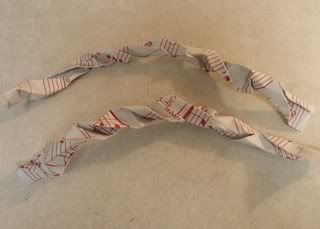
Take your paper and start twisting it and scrunch it as you twist.
And everything else is done the exact same as the ribbon flower! Although on this one I think I am going to change out the center...it looks a bit odd to me now that I am looking at it!! lol
Thank you for putting up with another Flower tutorial :-) I hope you like this one and will try it out! It only took me about 2 minutes max for each flower and seriously, they are adorable!!
Supplies Needed:
*Glue Gun
*Scrap cardstock
*Scissors
*Ribbon/Paper
First what we need to do is using our glue gun make a swirl of glue on our cardstock. Whatever size you want your flower to be.
Then we start adding our ribbon. Starting on the outside working in. As you adhear your ribbon to the glue you need to keep twisting and scrunching it loosly.
Keep twisting/scrunching your ribbon until you get to the middle. When you get to the very middle cut the ribbon about 1/2 inch and tuck that into the center making it look pretty!
Then simply cut the cardstock around the flower as close to the ribbon as you can. This ensures that your flower has a sturdy back!
Add a center if you wish. I think they look pretty without centers too!!
Next I am going to show you how to do this with paper. You will need to cut your paper into 2 inch strips. So they will be 2in x 12in. You will need 2 of these. Fold them in half .
Take your paper and start twisting it and scrunch it as you twist.
And everything else is done the exact same as the ribbon flower! Although on this one I think I am going to change out the center...it looks a bit odd to me now that I am looking at it!! lol
Thank you for putting up with another Flower tutorial :-) I hope you like this one and will try it out! It only took me about 2 minutes max for each flower and seriously, they are adorable!!